How to Automate HubSpot Lead Statuses (Practical Guide 2023)

How To Run Account Based Selling For Your B2B Company [GUIDE]

From this article, you'll learn a step-by-step process for automating lead statuses. By following this guideline you'll:

  1. Gain full visibility of the prospects: your teams not only see where the customer is in his journey. Now they know also what actions they need to take at every stage of the buying process.


  2. Build effective SLAs: each team member knows exactly what is expected of him and what he needs to do daily to hit his targets.


  3. Streamline sales and marketing activities with automation: your teams can save time on manual work and focus on building relationships with customers.

Let's dive into it.

Table of Contents 

Lifecycle stages' governance rules.

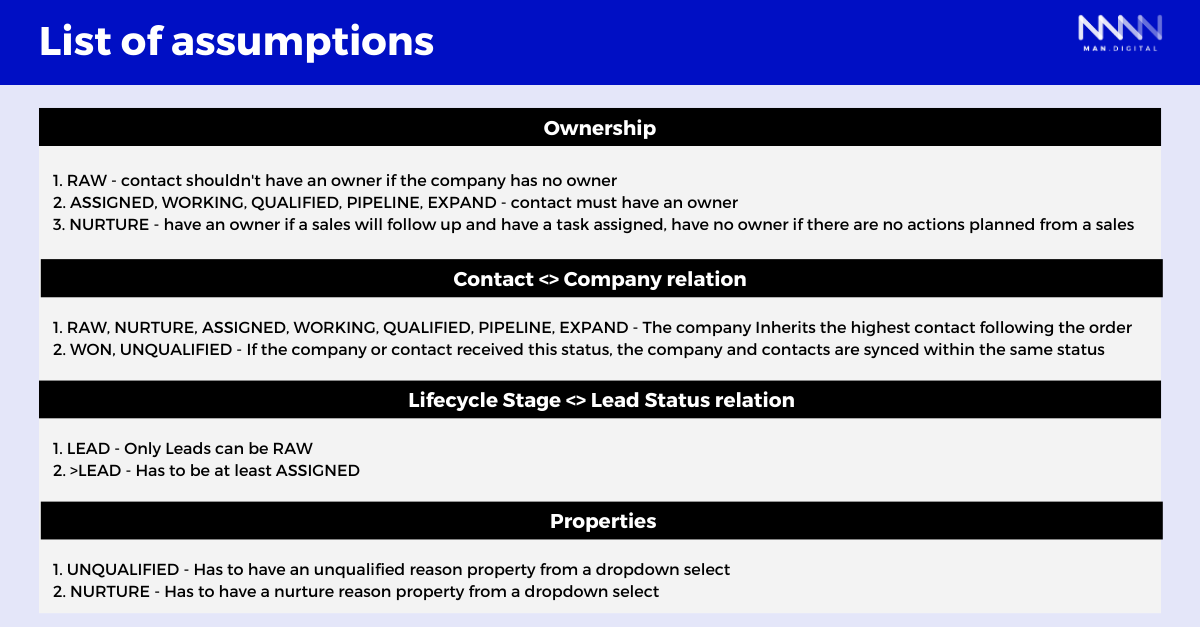
Before we begin, check the fundamental lifecycle stages' governance rules to keep in mind while doing automation.

Lifecycle stages' governance rules

Okay. It's time for heavy lifting. This is the process you should go through.

  1. Defining stages and triggers
  2. Building inclusion lists for each contact lead status
  3. Building inclusion lists for each company lead status
  4. Building workflows 

Define stages and triggers 

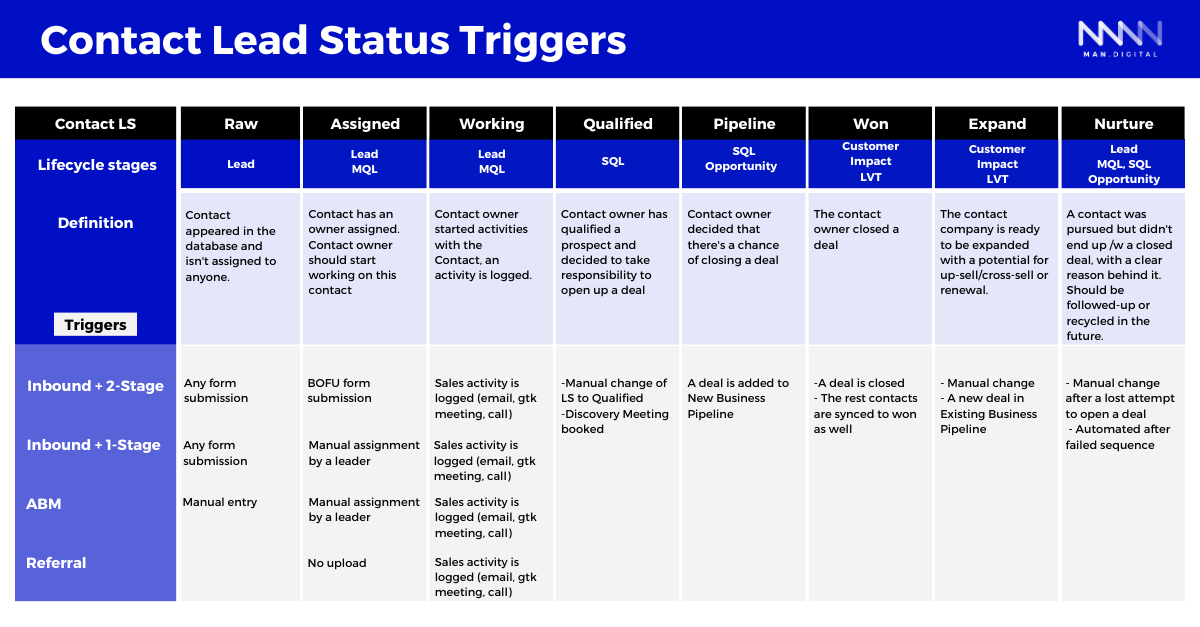
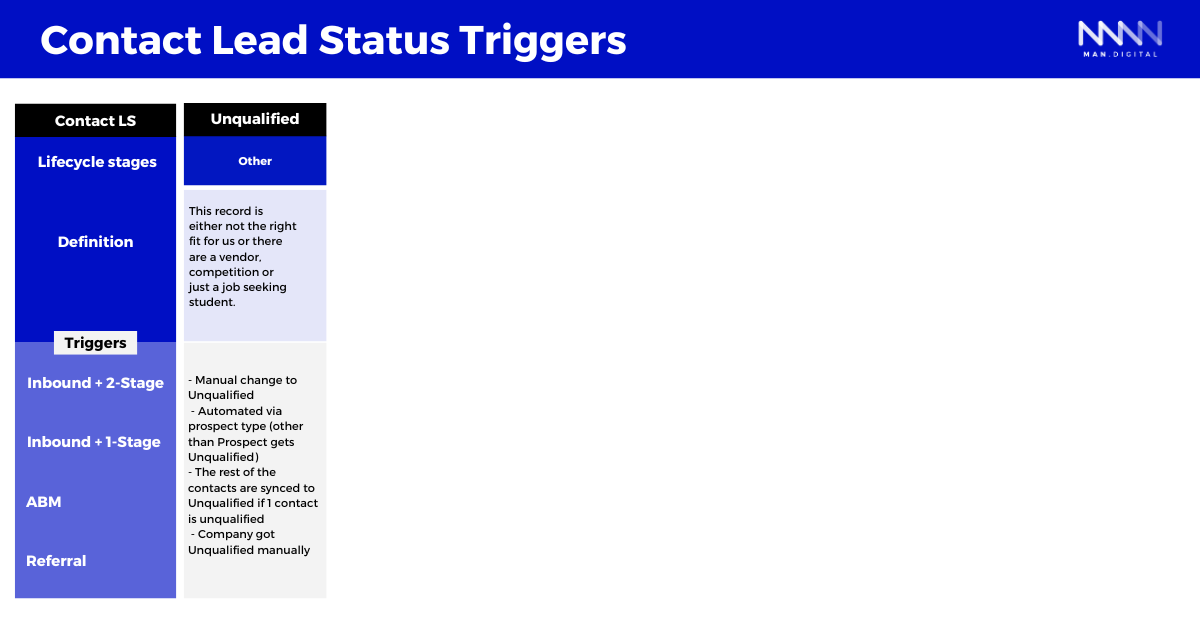
Before jumping into automating lead statuses, you need to define triggers that will move certain contacts and companies from one status to another.

Caution: in case of lead statuses, you need to create separate triggers, both on the contact and company levels.

Triggers for contact lead statusTriggers for contact lead status

Company lead statuses and triggers

Triggers for company lead status

Triggers for company lead status

Build inclusion lists for contacts and companies


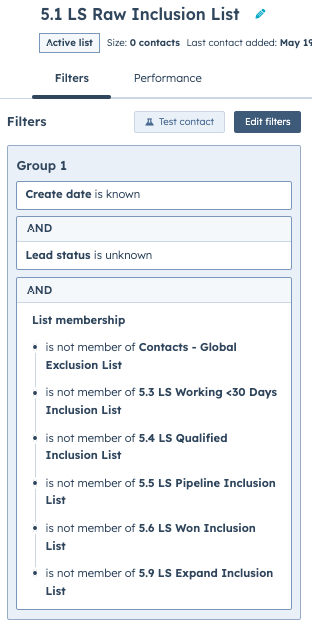
Contact inclusions lists are built inside HubSpot to keep all contacts that fit the criteria.

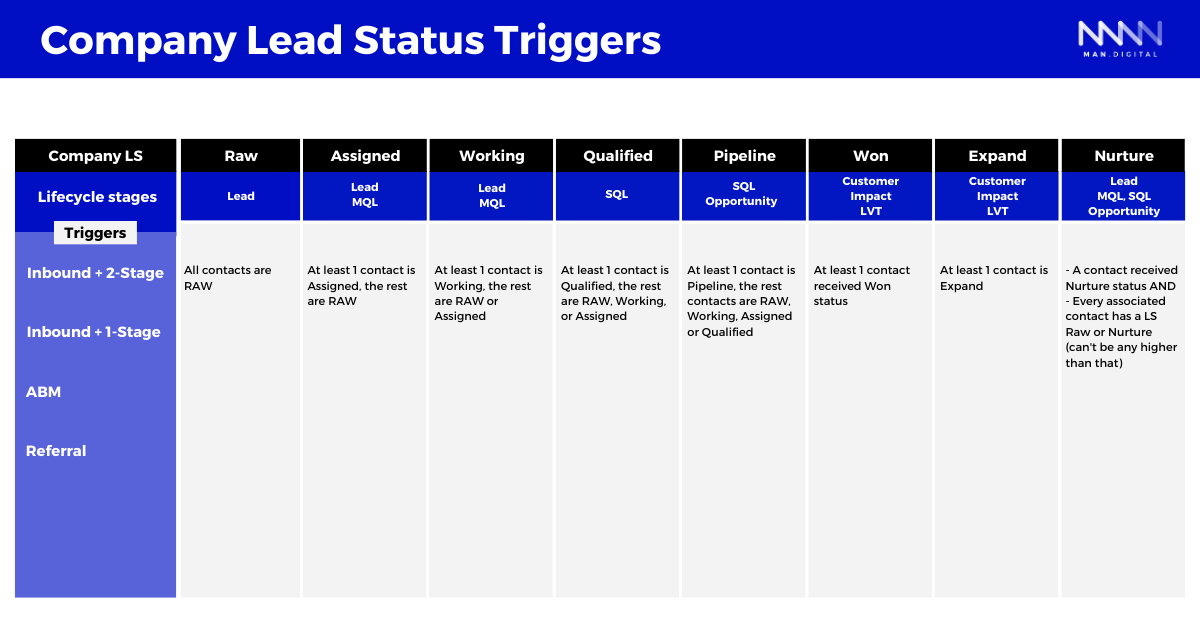
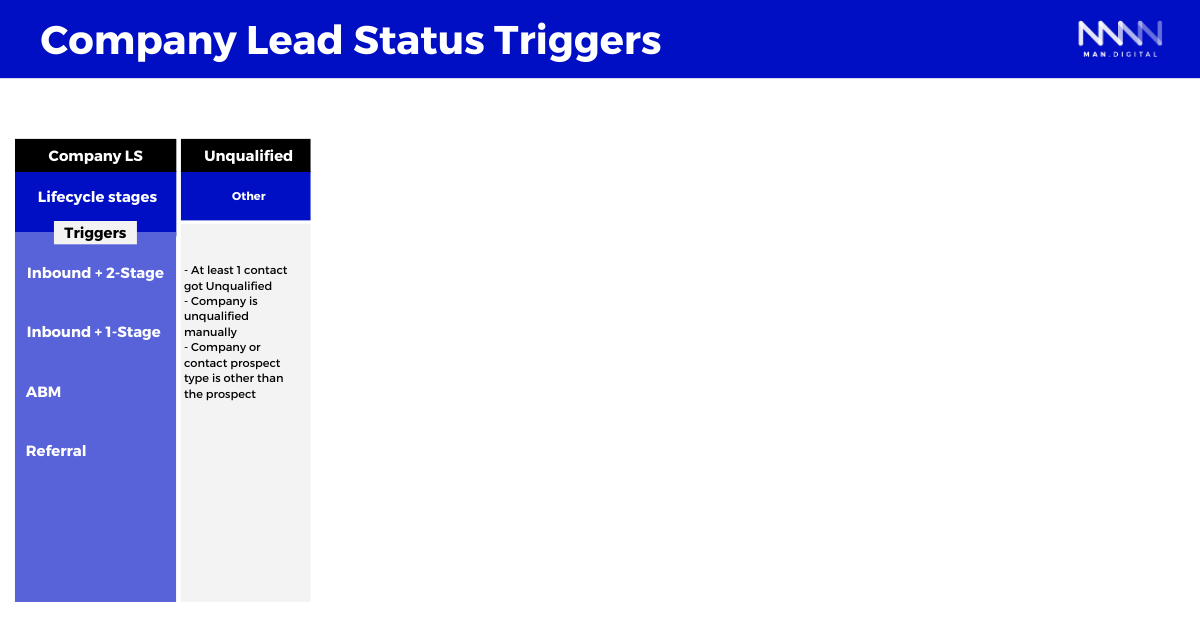
In turn, the company inclusion lists make sure that the company inherits the correct lead status from the contact.

Remember, you need to build separate lists for contacts and for companies.

Let's look at the example of RAW and Assigned lead statuses inclusion lists.

Inclusion List for the RAW lead status

Inclusion List for Raw lead status

To make the company inherit RAW lead status from the contact you create a separate list that looks like this.
Inclusion list for a company raw lead status

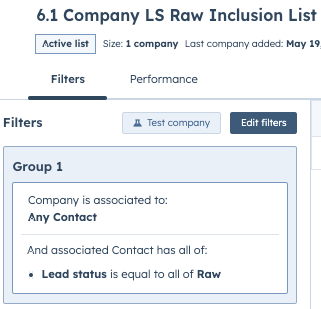
Keep in mind, that you need to build inclusion lists for all lead statuses, both on contact and company level.

Build workflows for lead statuses

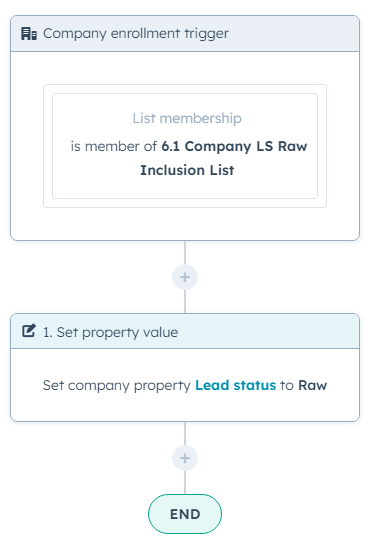
In this step, you build 2 types of workflows:

  1. Set lead status to contact - if contact meets the criteria defined for specific lead status, assign a lead status to it.
  2. Set lead status to the company - the company inherits the highest lead status from the contact assigned to that company

Again, let's look at the example of RAW and Assigned lead statuses for contacts and companies.

Set New Contacts to RAW Workflow

Workflow for setting up raw lead status

Whenever a new contact is added to the database it will get lead status RAW.

Same thing with a company associated with that contact

Set RAW Lead Status to Company Workflow

Workflow for setting up raw lead status

Whenever a contact meets a trigger it will change status from RAW to Assigned.

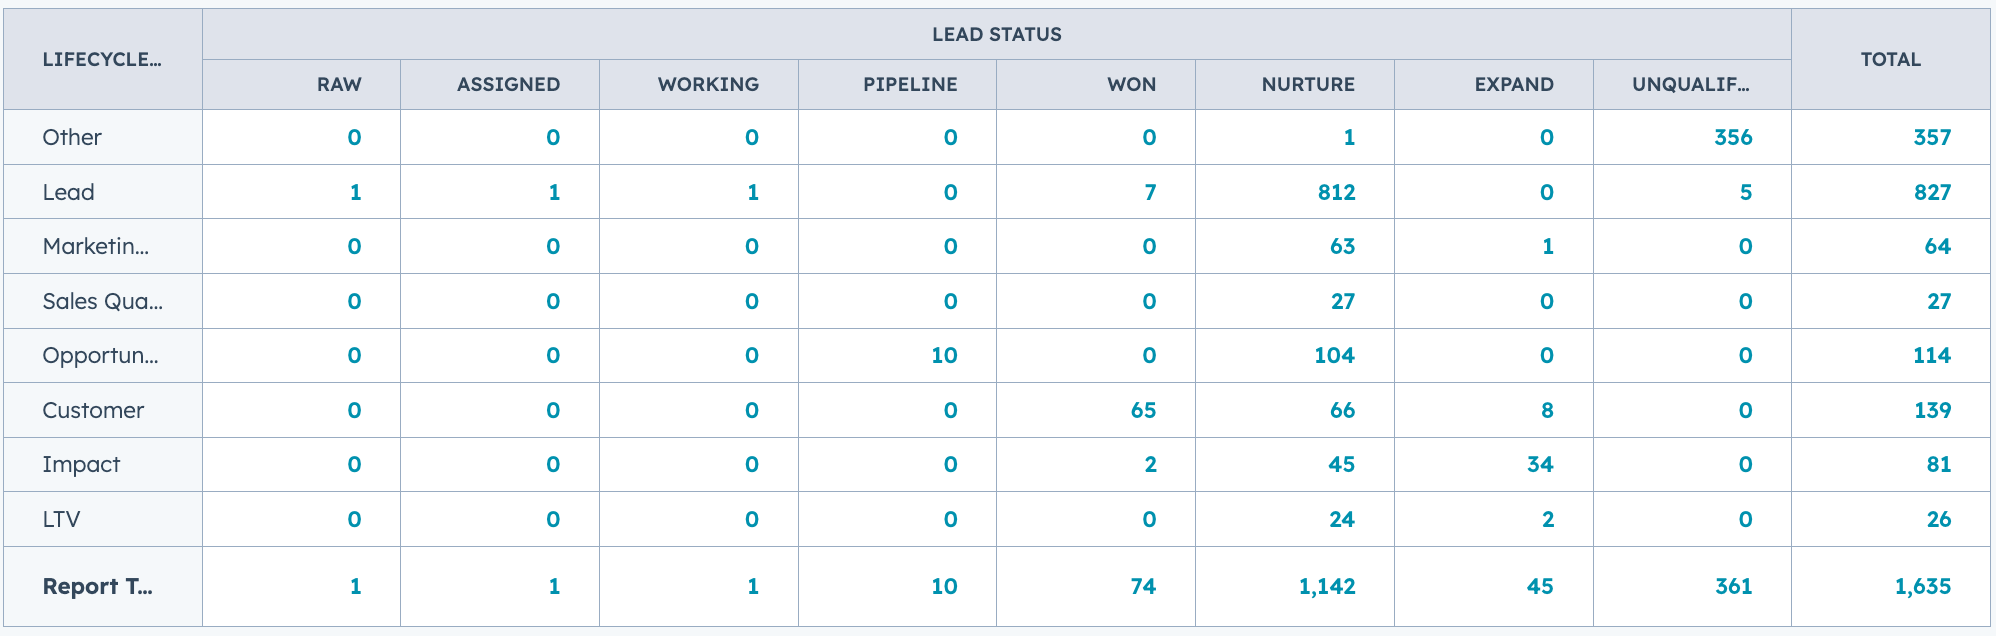
This is how all properly set-up lead statuses work together with lifecycle stages in HubSpot.

How lifecycle stages and lead statuses work together

If you want to learn how to automate lifecycle stages, read this article.

Remember, similar to Lifecycle Stages, to make Lead Statuses work you have to:

  • define triggers for all lead statuses
  • build inclusion lists both for contacts and companies
  • build workflows both for contacts and companies
  • turn on lead statuses workflows
about the author
Arek Piatek - I help B2B companies drive revenue with Demand Generation Programs. RevOps Evangelist and marketer who thinks outside the funnel. Creating marketing programs aligned with how people want to buy, not in a way companies want to sell to them.